How to use printing
On this page, you can find a guide for FollowME printing. With FollowME printing, you can send a document to print and retrieve it from any FollowME printer by logging in there.
FollowME print - Mac and Windows
FollowME print - Mac and Windows
On Aarhus University FollowME print will be gradually introduced beginning in 2023.
Do I have FollowME in my area?
Yes, if you're met by a login screen on your local MFP (Multifunction printer) it is because the MFP is setup to use the AU FollowMe print solution.

FollowME on AU
On AU, for employee FollowME print, we use a Hybrid Cloud Print FollowME solution from Y-soft, named HCP Ysoft cloud print, but going by the name HCP Follow-ME.
Print to FollowME by printing to the HCP FollowME print queue on you Windows or Mac PC.
You can also have HCP FollowMe setup on your Linux PC. Please contact you local IT support for details.

The print queue should be available on your PC, provided you're in an area where HCP FollowME has been introduced.
If you do not have the HCP FollowME print queue, and provided you're in an area where HCP FollowME has been introduced, please contact your local IT support.
Print release at the MFP
After you print to the FollowME queue, the print can be collected at the nearest FollowME multifunction printer (MFP).
Card registration
First time you login to a FollowME multifunction printer (MFP) your card needs to be registered in the system.
You do that your self on the MFP.
Please also see details on the posters hanging by the MFP.
1. Scan your card and enter your AU user ID (AUxxxxx) and password. Your card is now registered for future use.
2. Release your print by pressing the "pull print" icon.
 On the Ricoh MFPs it looks like this >>
3. Select any/all jobs and press Print.

4. Log out after releasing your print
Scan to mail and copying can also be performed directly after login.

FollowME print Guest users
FollowME print Guest users
If your department has implemented FollowME print, guests and external users will be able to print to the FollowME printer.
Externals and guests registered with an AUID
If you are registered with an AUID, you will be able to print to the FollowME printer from webprint.au.dk. You must have a card with an NFC chip, either a guest card, travel card or any other card with an NFC chip.
- You log in to webprint.au.dk with your AUID AUxxxxx and your associated password.
- Upload document under My documents

3. Click on “Send to secure Queue”
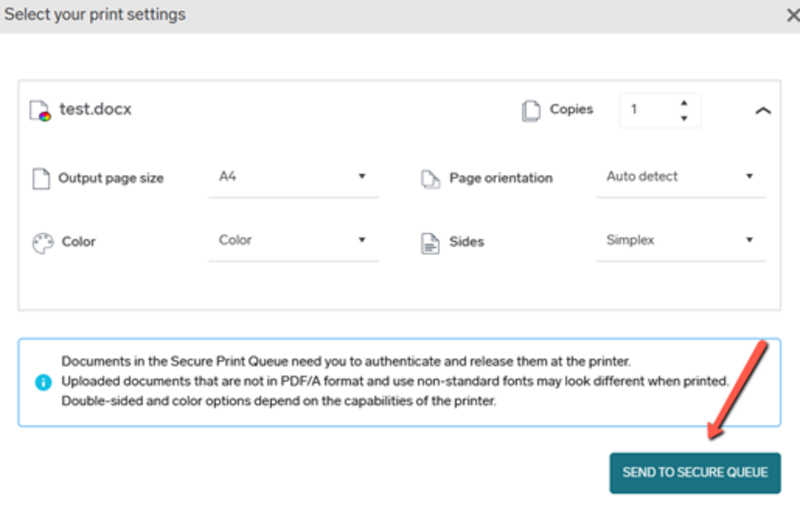
4. Go to the printer and follow the instructions for releasing the print, which you can either find in the printer room or above under FollowME print Mac and Windows. The first time you scan your card, you need to log in with your AUID AUxxxxx.
Externals and guests who are NOT registered with an AUID
If you are not registered with an AUID, an AU employee in the department can help you create a guest user. The guest user is created from the page https://followmeguest.au.dk/, where you log in with [email protected] and your associated password.
Enter the name, email and desired expiration date for the guest user you want to create and click create.

The guest user will receive an email with a username and password, which can be used to log in to webprint.au.dk. See instructions for uploading and releasing prints above under "externals and guests registered with an AUID". The first time you scan your card, you need to log in with your guest user account and password.
AU employees can also reset the password for the guest user account on https://followmeguest.au.dk