How to install a printer and set up secure printing
On this page, you can find a guide for installing an AU printer and setting up secure printing.
PC - Windows
How to install a printer
- Find the name of the printer you want to install (the name is often written on a label on the printer. The location of the printer (building number and room number) is part of the printer’s name.)
- Activate your admin rights in Heimdal
- Click the ‘Install Printer’ shortcut on your PC’s desktop. If this shortcut is not available, write ‘\\prt11.uni.au.dk’ in the address bar in ‘File Explorer’.
- You must now find the printer you want to install. You can use the search field in the top right-hand corner to search based on building number.
- When you have found the relevant printer, double-click on the printer.
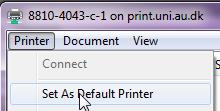
- When the dialogue box is displayed, the printer is installed. If relevant, you can select ‘Printer – Set as default Printer’ in the dialogue box to ensure that this printer is automatically used when you print.
If you want to install more than one printer, repeat the procedure above.
If you install a printer on a PC which is not part of the domain, you will be asked to enter user ID and password. Please use your UNI user ID in the following format AU"auid"@uni.au.dk - For example AU229706@uni.au.dk and enter your password.
How to set up secure printing for Konica
1. Click Windows ‘Start’ (bottom left on the screen).
2. Select/search for ‘Devices and Printers’.
3. Right-click on the printer and select ‘Printing Preferences’.

4. Select ‘Secure Print’ under ‘Output Method’ and enter user ID and password.
5. Then click ‘OK’.
The printer is now ready but will not print until you release the print job via the printer’s display. See how to do this below.
How to release a secure print job
This guide will show you what to do on the printer – not on your computer.
Applies to C220, C280, C360 and C650:
- Press the ‘Boks’ (box) button below the display and select the display button ‘Brugerbakke for sikker udskrift’ (tray for secure printing).
- Enter user ID and press the display button ‘OK’. Enter password and press the display button ‘OK’.
- Select the print job/jobs you want to print
- Press ‘Start’.
Applies to C224, C2804, C364 and C654:
- Press the ‘Menu’ button at the top right.
- Press the ‘Brugerbakke (Brg.bakke)’ (user tray) display button
- Select ‘Sikker udskrift’ and log on using the secure print ID and the password you have chosen.
- Select the print job/jobs you want to print and then print (Udskriv).
Applies to C450i, C650i
1. Press the display button ”Brg.bakke" or ”Boks”
2. Press the display button ”System".
3. Select ”Sikker udskrift” and log on using the secure print ID and the password you have chosen.
4. Select the print job/jobs you want to print and then print (Udskriv).
How to set up secure printing for Ricoh
1. Click Windows ‘Start’ (bottom left on the screen).
2. Select/search for ‘Devices and Printers’.
3. Right-click on the printer and select ‘Printing Preferences’
4. Mark "Locked Print" in "Output Method", then open "Details". Select "Windows Login Name" and enter a 4-8 digit pin/password.
5. Click "OK", "OK"
The printer is now ready but will not print until you release the print job via the printer’s display. See how to do this below.
How to release a secure print job
This guide will show you what to do on the printer – not on your computer.
Press "Quick print release" (Danish menu: "Lynprint")
Choose your user ID and enter the pin/password you selected above and press "OK"
You can now select and release the stored job(s)
How to set up secure printing for a Xerox WorkCentre 78xx printer
How to set up secure printing with a password on your PC
- Click Windows ‘Start’ (bottom left on the screen)
- Select/search for ‘Control Panel’
- Select ‘View devices and Printers’
- Right-click on the printer and select ‘Printing Preferences’
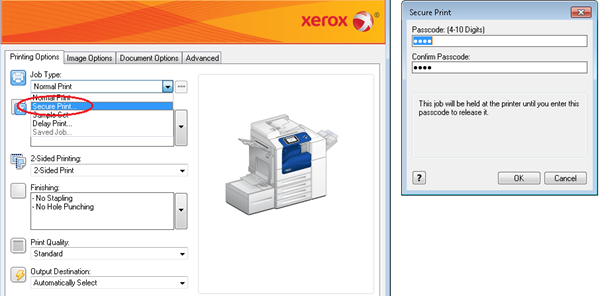
5. Select ‘Secure Print’ under ‘Job Type’ and enter an optional password.
6. Then click ‘OK’.
The printer is now ready but will not print until you release the print job via the printer’s display. See how to do this below.
How to release a secure print job on the printer
-
Press the button ‘Job Status’.
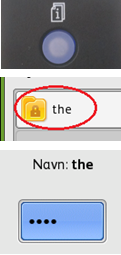
- Click the folder with your user ID
- Enter the password you selected above and then press ‘OK’
- Select the relevant print jobs and click ‘Frigiv’ (release) or ‘Frigiv alle’ (release all)

![]()
How to set up secure printing for a Xerox AltaLink C80xx printer
How to set up secure printing with a password on your PC
- Click Windows ‘Start’ (bottom left on the screen).
- Select/search for ‘Control Panel’.
- Select ‘View devices and Printers’.
- Right-click on the printer and select ‘Printing Preferences’.

5. Select ‘Secure Print’ under ‘Job Type’ and enter an optional password.
6. Then click ‘OK’. The printer is now ready but will not print until you release the print job via the printer’s display.
See how to do this below.
How to release a secure print job
If you have a Xerox Altalink C80XX printer, you must do the following:
- Press ‘Jobs’.
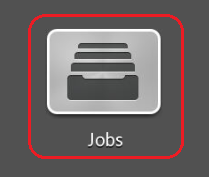
- Select ‘Secure jobs’
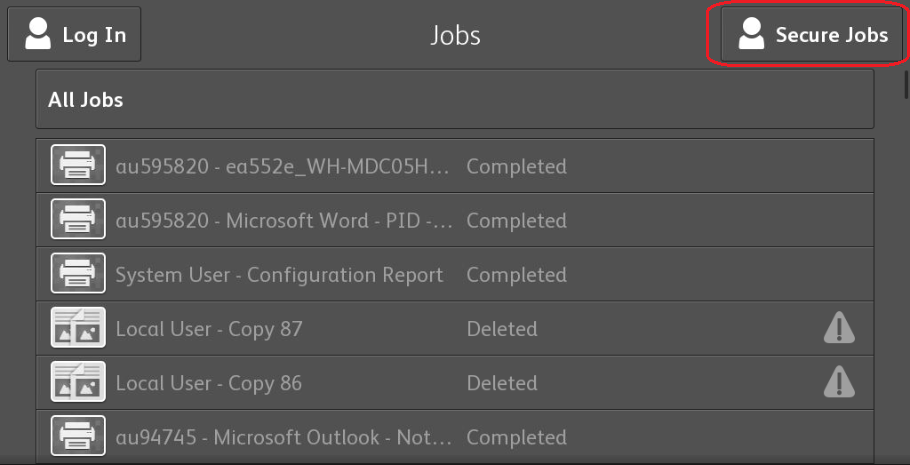
- Select your folder

- Enter the password you selected when you set up the secure print job
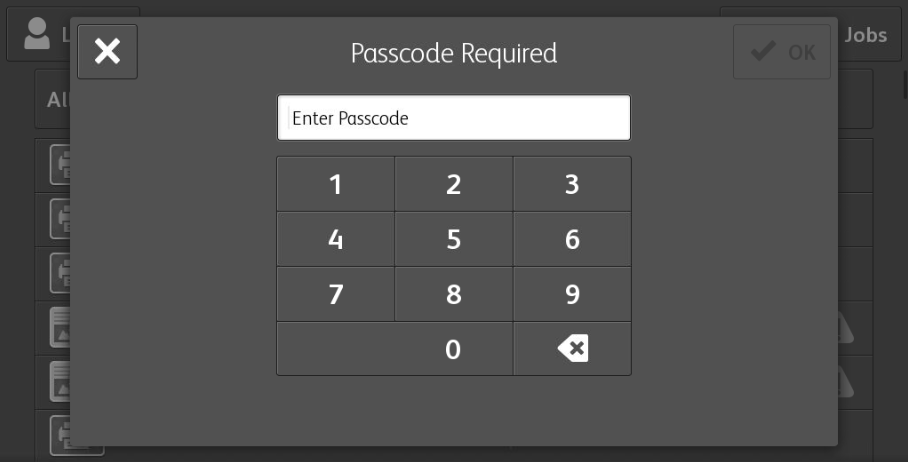
- Release the job(s) you want to print