How to get VPN access
VPN
When you log on to the virtual private network (VPN), it’s like working on a computer at AU: you have the same level of protection. In other words, your internet connection is encrypted, which makes it invisible to anyone who might want to intercept your data.
To academic staff
- Use the VPN as much as possible when working from home.
- But note than you may only use the VPN network if you’re working on AU equipment – that is to say, equipment provided to you by AU, such as your work computer.
- If you can’t work on AU equipment but have to work on a personal pc instead, for security reasons, do not install or log onto VPN.
- If you are currently using your personal computer but you have an AU computer at the university, you are allowed to go to campus to pick up your equipment.
- If you are teaching remotely, you should temporarily log off the VPN network during the teaching session to ensure the best user experience. We also ask you to be careful not to share sensitive personal data and confidential information while teaching remotely, because your data isn’t encrypted when you’re not logged on the VPN.
- Be aware that the VPN can cause problems with online meetings, for instance. Log off during your meeting and log in again afterwards.
To administrative staff
- Use the VPN as much as possible when working from home.
- But note than you may only use the VPN network if you’re working on AU equipment – that is to say, equipment provided to you by AU, such as your work computer.
- If you can’t work on AU equipment but have to work on a personal pc instead, for security reasons, do not install or log onto VPN.
- If you are currently using your personal computer but you have an AU computer at the university, you are allowed to go to campus to pick up your equipment.
- Be aware that the VPN can cause problems with online meetings, for instance. Log off during your meeting and log in again afterwards.
This is a VPN setup guide for employees at AU. You can use VPN to access some of AU’s services from home (i.e. access to shared drive) even though these services are usually only available when you are on the university’s network.
How to log on to VPN from your AU PC (Windows)
In order to log on to VPN, Cisco AnyConnect must be installed. In general, Cisco AnyConnect is already installed on AU PCs (Windows). If this is not the case, please follow the guide on how to do this in the section ‘How to install the VPN client on a PC (Windows)’.
How to log on to VPN
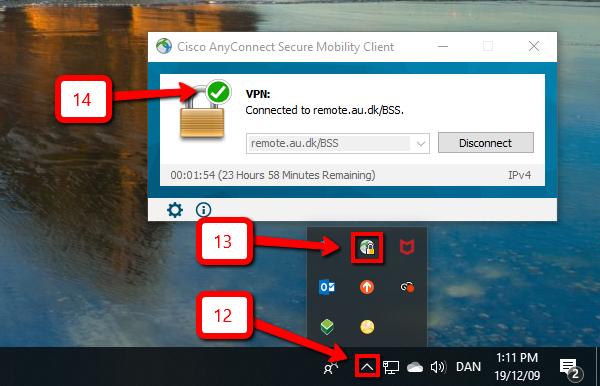
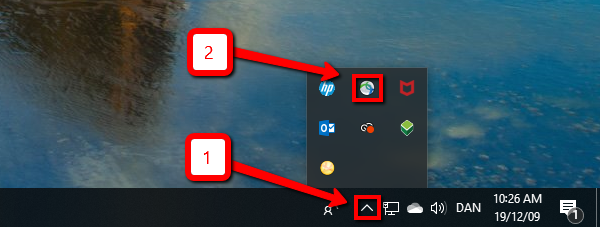
1. Click the small arrow in the task bar at the bottom right-hand corner of the screen.
2. Click the Cisco AnyConnect icon.
If you cannot see the icon, search by writing ‘Cisco AnyConnect Secure Mobility Client’ in the start field and try to open the program this way.
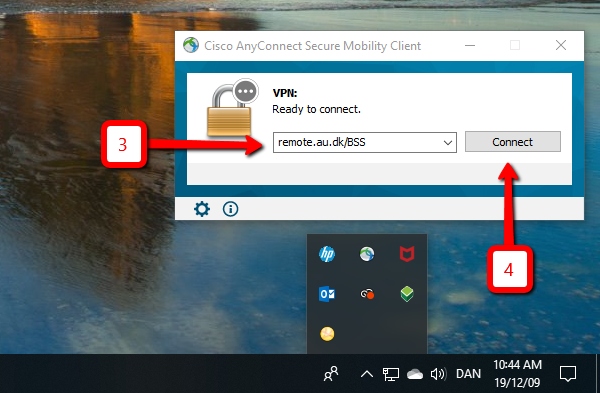
3. In the field, write ‘remote.au.dk/’ followed by your faculty abbreviation. The faculty abbreviations are: ‘ARTS’, ‘BSS’, ‘FA’ (the central administration), ‘HE’, ‘ST’.
4. Click ‘Connect’.
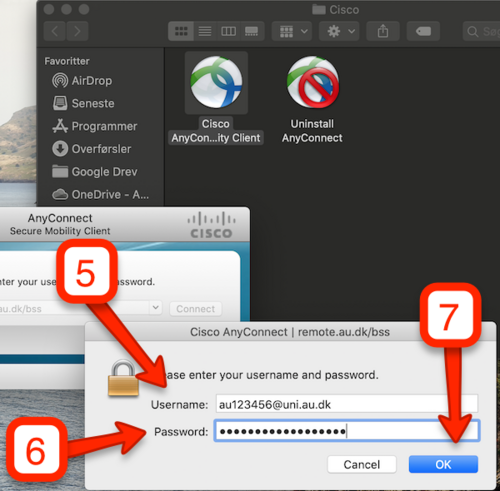
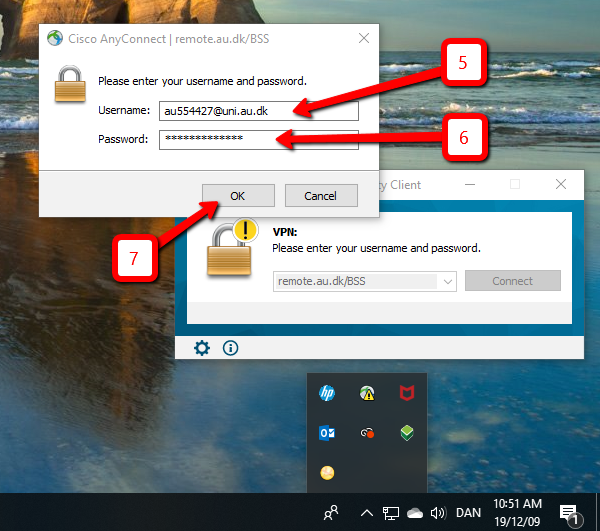
5. Enter your AU ID followed by ‘@uni.au.dk’.
6. Enter the password you use to log on to your AU PC.
7. Click ‘OK’.
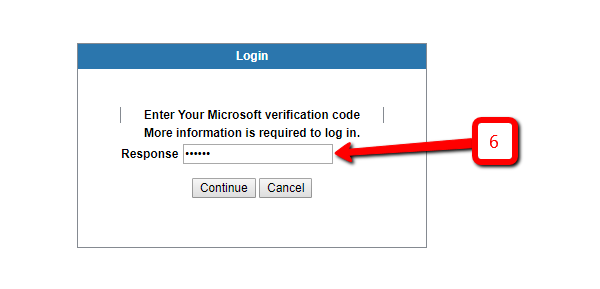
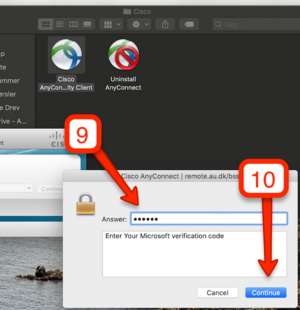
The screen displayed depends on whether you have chosen to set up two-step authentication with the app or an SMS code. Both options will be described below.
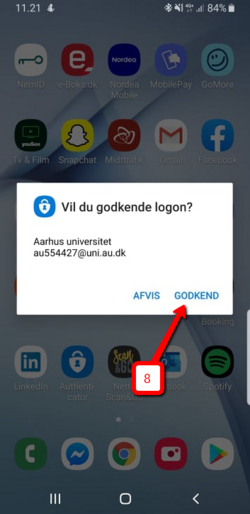
8. If two-step authentication is connected via the app, you will receive a notification which you must approve.
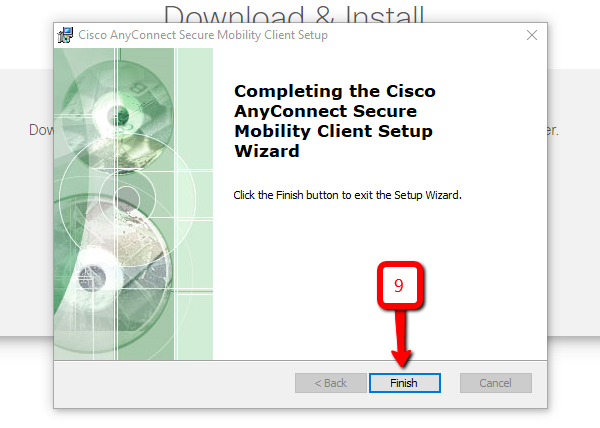
How to install the VPN client on a PC (Windows)
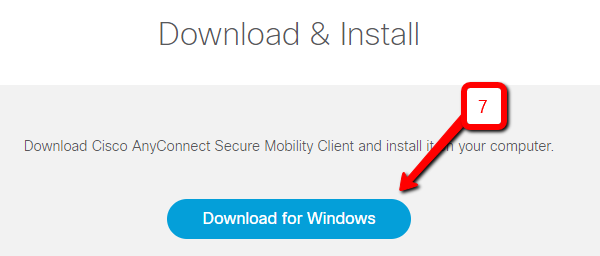
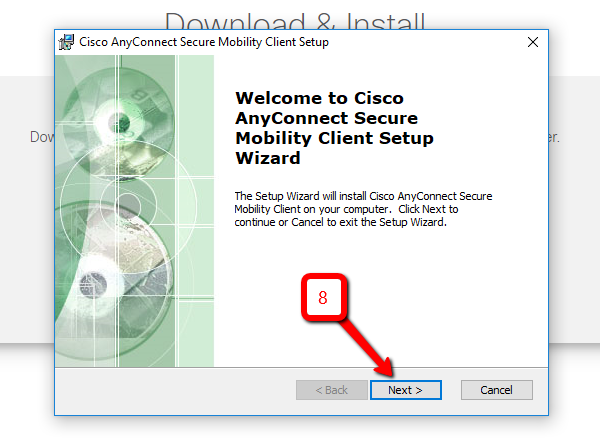
If you do not have access to VPN on your AU PC, you must first install the Cisco AnyConnect client.
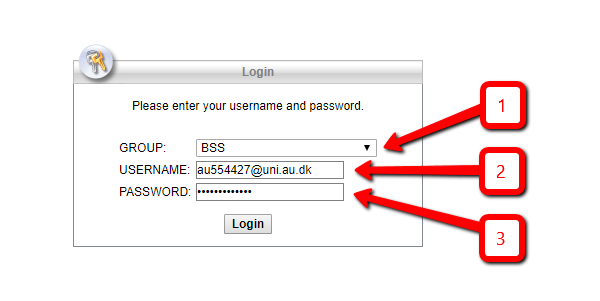
1. Select your faculty.
2. Enter your AU ID followed by ‘@uni.au.dk’.
3. Enter your password which is the same as the password you normally use to log on to AU's systems.
The screen displayed depends on whether you have chosen to set up two-step authentication with the app or an SMS code. Both options will be described below.
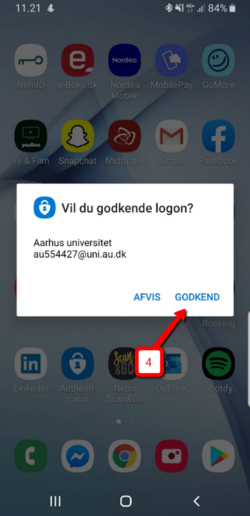
4. If two-step authentication is connected with the app on your phone, you will receive a logon request which you must approve.
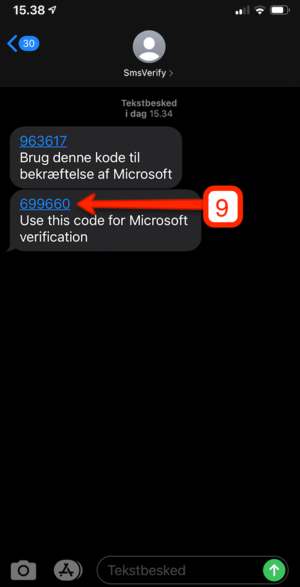
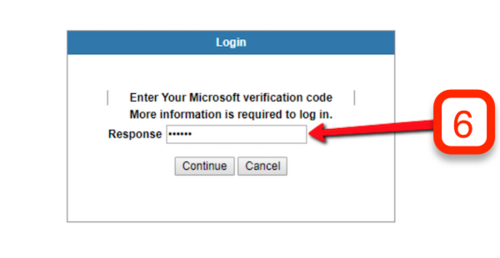
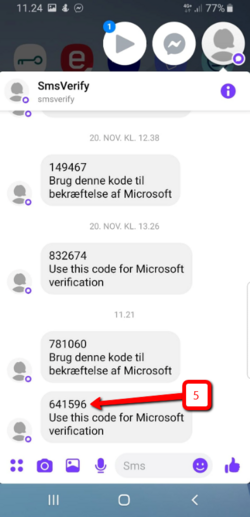
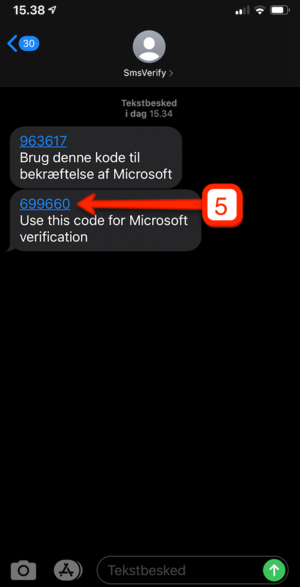
5. If two-step authentication is connected with an SMS code, you will receive an SMS code on your mobile.
How to log on to VPN from your AU Mac OS
In order to log on to VPN, Cisco AnyConnect must be installed. In general, Cisco AnyConnect is already installed on AU PCs (Mac OS). If this is not the case, please follow the guide on how to do this in the section ‘How to install the VPN client on a Mac OS’.
How to log on to VPN
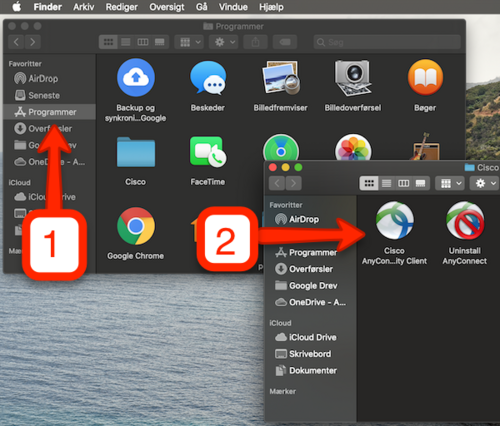
1. Open the folder ‘Programs’
2. Find the Cisco AnyConnect Client and double-click.
3. In the field, write ‘remote.au.dk/’ followed by your faculty abbreviation. The faculty abbreviations are: ‘ARTS’, ‘BSS’, ‘FA’ (the central administration), ‘HE’, ‘ST’.
4. Click ‘Connect’.
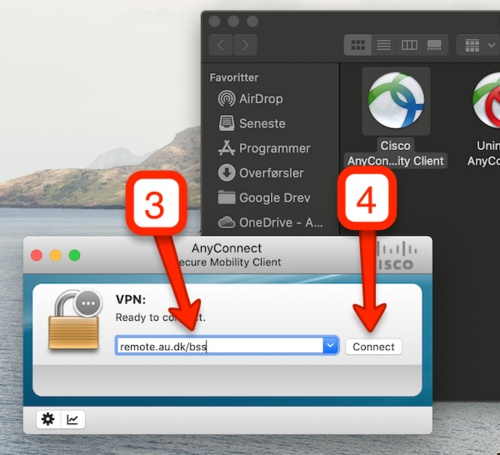
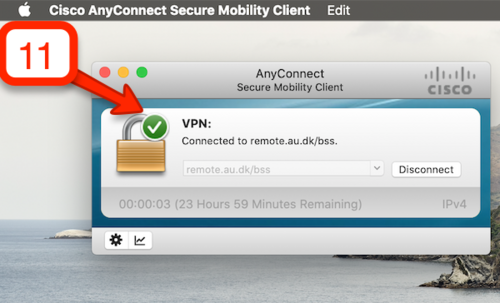
8. If two-step authentication is connected via the app, you will receive a notification which you must approve.
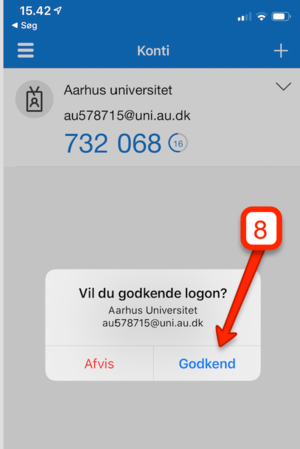
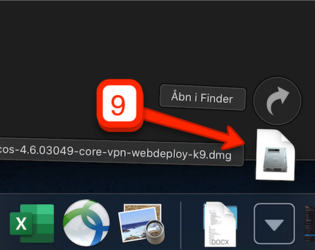
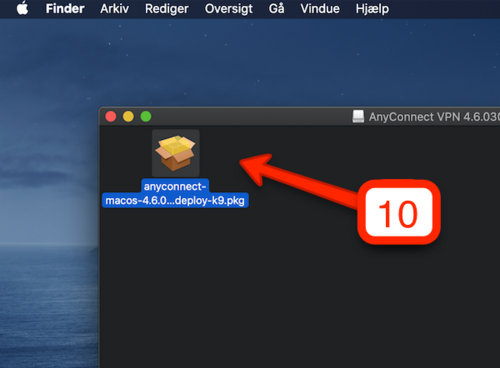
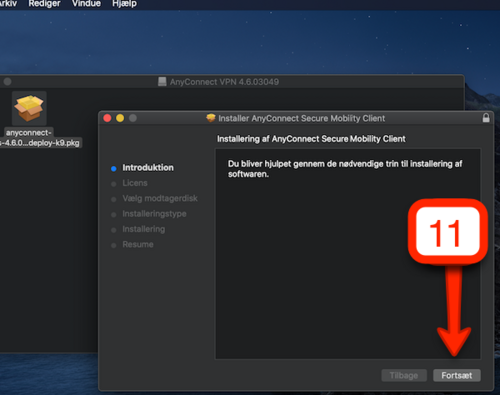
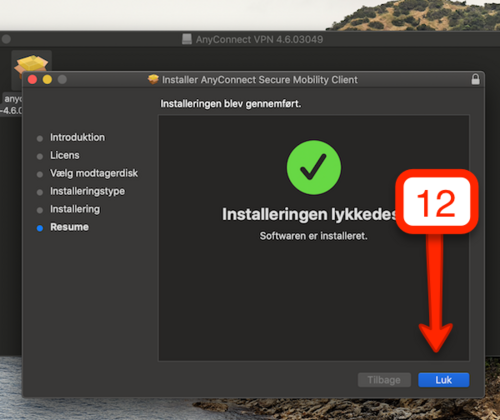
How to install the VPN client on a Mac OS
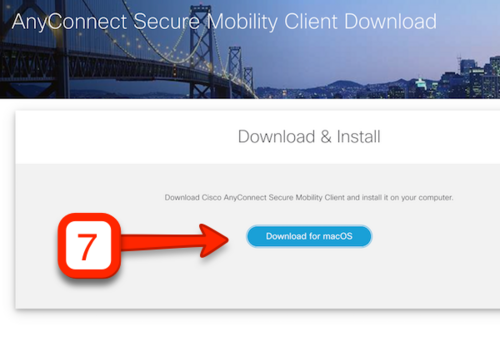
If you do not have access to VPN on your AU PC, you must first install the Cisco AnyConnect client.
1. Select your faculty.
2. Enter your AU ID as your username followed by ‘@uni.au.dk’.
3. Then enter your password which is the password you use for other AU platforms.
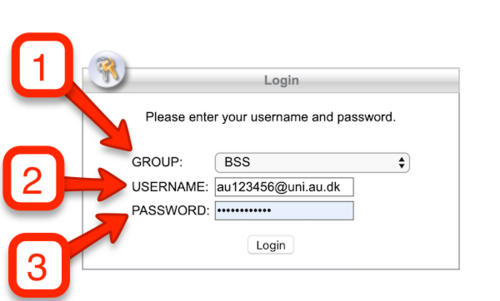
The screen displayed depends on whether you have chosen to set up two-step authentication with the app or an SMS code. The next step describes the confirmation process for each method:
4. If two-step authentication is connected with the app on your phone, you will receive a logon request which you must approve.
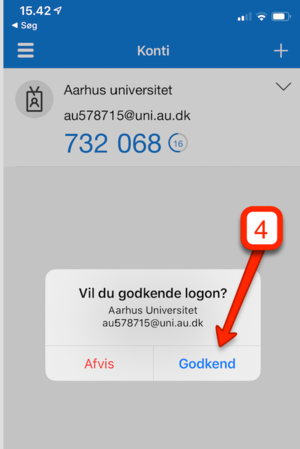
5. If two-step authentication is connected with an SMS code, you will receive an SMS code on your mobile.
Installation guides and logon with two-step authentication for consultants
Log on to VPN with two-step authentication
In order to improve security in connection with VPN access to AU’s network, it has been decided that two-step authentication (two-factor authentication) must be used.
How to register the consultant for two-step authentication
The external consultant’s AU contact person must ensure that the consultant is registered with the relevant email address and mobile phone number. Contact your local IT-support regarding the registration.
Logon with two-step authentication
In connection with logon, an SMS code will be sent to the consultant’s mobile phone number. This code must be entered in addition to the usual username, ‘ext-xxx@uni.au.dk’, and password.


