How to add and remove members on a distribution list
Distribution lists
Once your mailbox has been moved to Office 365, you can no longer manage the members of distribution lists / groups from Outlook.
Therefore, a self-service tool has been created on AU's IT-Selfservice portal, which all employees can use to manage of distribution lists / groups.
Here you will find self-service for groups
You can find it here: https://it-selfservice.au.dk
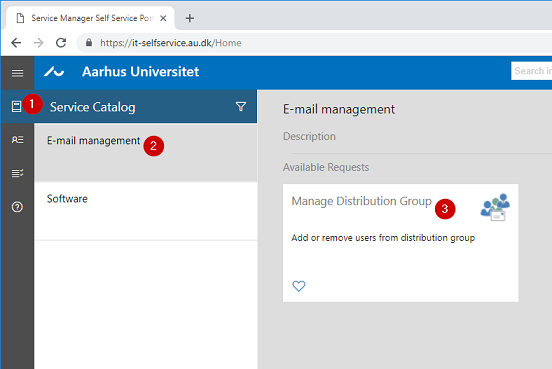
Once you have entered the site you will find the tool below:
Service Catalog (1) -> Email management (2) -> Manage Distribution Group (3)

Add members
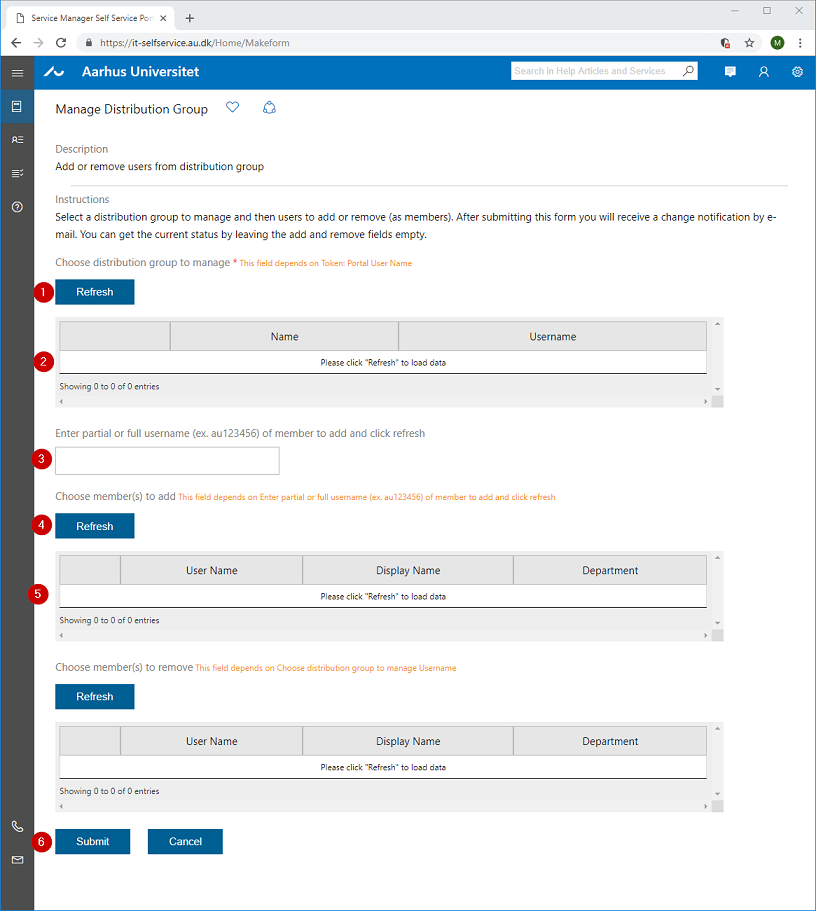
- Click Refresh to view distribution groups that you can change.
- Select the distribution group that you want to change (check the box).
- Enter all or part of the user name of the user to add.
- For example, au12345
- Write au and at least 2 digits so it does not take too long to retrieve the user list.
- Click Refresh (just below “Choose member (s) to add”) to download username list.
- Do not click on Refresh without filling in the "Enter partial or full username" field; otherwise, it will take a while to retrieve the user list.
- Select the user (s) to add to the distribution group by checking the square boxes next to each user in the list.
- Click Submit at the bottom to submit the change request.
If many users need to be added, it is possible to enter usernames (maximum 20) (ex. auxxx,auxxxx,auxxxx) in the field "Enter partial of full username (ex. au123456) of member to add and click refresh". Afterwards press Submit.
You have now placed an order, and after a few minutes, when processed, you receive an email about the result. The e-mail also contains a complete list of members of the distribution group.

Remove or view members
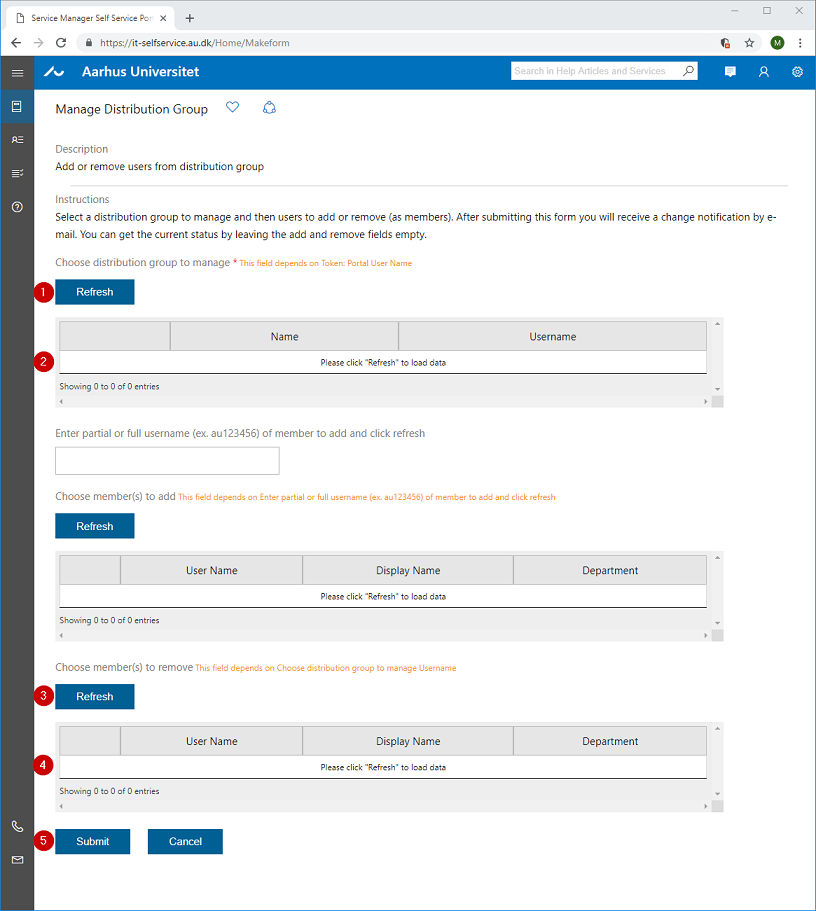
- Click Refresh to view distribution groups that you can change.
- Select the distribution group that you want to change (check the box).
- Click Refresh (right below “Choose member (s) to remove”) to retrieve members of the distribution group. If you just want to see who is a member, you can skip the following points and click Cancel.
- Select user (s) to remove from the distribution group by checking the boxes next to each user in the list.
- Click Submit at the bottom to submit the change request.
You have now placed an order, and after a few minutes, when processed, you receive an email about the result. The e-mail also contains a complete list of members of the distribution group.
