How Data Loss Prevention policies work
AU has set up some Data Loss Prevention (DLP) policies to prevent data loss by identifying - and thus protecting - sensitive personal data processed by the university. The aim of the DLP policies is to ensure that sensitive personal data is not shared through Outlook or SharePoint with people who are not employed at Aarhus University.
However, this does not mean that you cannot send/share sensitive personal data with e.g. external partners. In this case, the data will need to be encrypted when it is sent, for example through AU’s secure email solution.
On this page, you can learn how the DLP policies work in Outlook and SharePoint.
How the DLP policies work in Outlook (Only PC and webmail)
The DLP policies in Outlook scan data in emails that have an external email address (i.e. an email address that does not end in ‘au.dk’) in the To, Cc or Bcc field to determine if they contain sensitive personal data.
The DLP policy will not be able to catch everything, as it has been set up based on a set of standard parameters. Therefore, it is important that you are alert to the security issues when you need to send sensitive personal data. If you need to send this kind of data to recipients outside AU, you should use AU’s secure email solution.
If the DLP policy identifies data that appears to be sensitive personal data in your email, one of two things will happen.
1. You will receive an email
Immediately after pressing ‘Send’, you will receive an email informing you that your email was not sent because the DLP tool identified data that appeared to be sensitive personal data. The email will look like this:
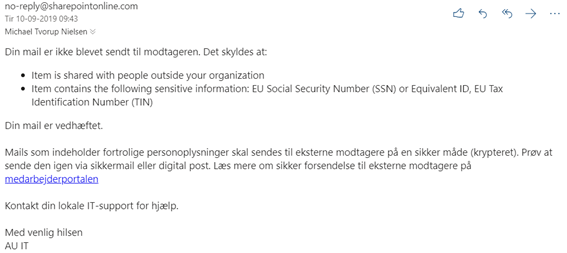
2. You will receive a so-called policy tip
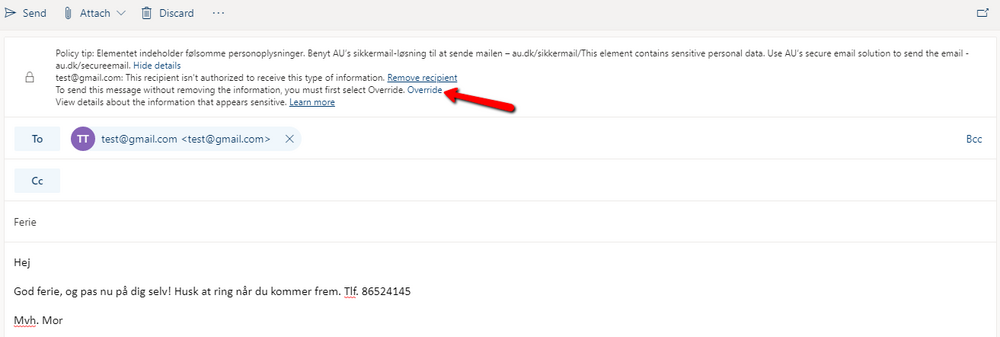
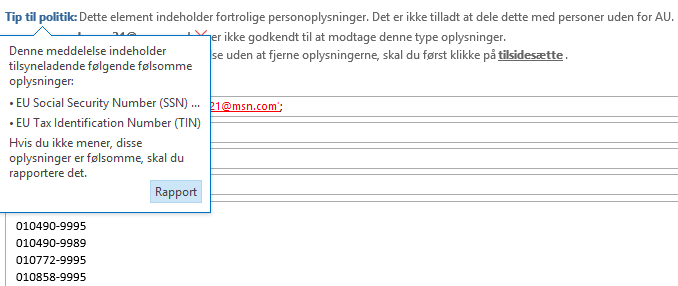
Before you press ‘Send’, a policy tip will appear at the top of the email, if the DLP tool identifies data that appears to be sensitive personal data. The policy tip will look like this:
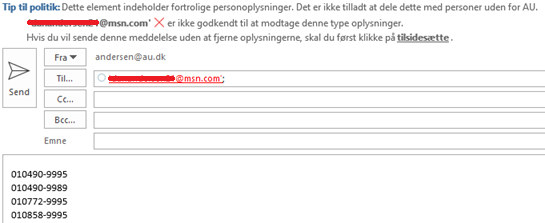
You must do the following in order to proceed:
- Click ‘Override’ in the policy tip.
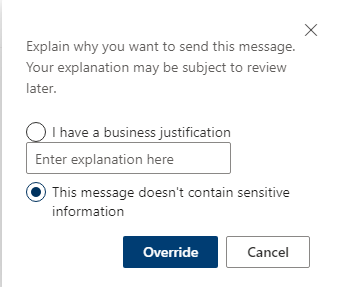
- You now have two options, and you must choose one of them.
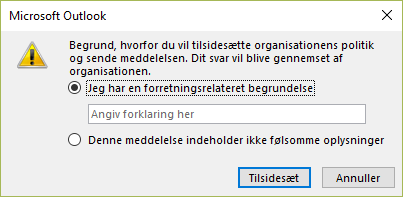
2.a If you fill in a business justification, you will see the message below, and you will be able to send your email to the external recipient. AU IT and the information security department will be able to read your statement.
![]()
2.b If you select ‘This message doesn’t contain sensitive content’, you will see the message below, and you will be able to send your email to the external recipient. AU IT and the information security department will be notified that your email does not contain sensitive personal data.
![]()
3. You can also click on ‘Policy tip’. The message below will then be displayed, and you can click on ‘Report’ which will allow you to send your email to the external recipient. AU IT and the information security department will be notified that you have sent an email that may contain sensitive personal data.
How the DLP policies work in SharePoint
The DLP policies in SharePoint scan data in files that you wish to share with people outside AU, e.g. external partners, to determine if they contain sensitive personal data.
The DLP policy will not be able to catch everything, as it has been set up based on a set of standard parameters. Therefore, it is important that you are alert to the security issues when you need to share sensitive personal data with people outside AU. If you need to share this kind of data with external recipients, you can contact your local IT support team which can help you find a secure solution.
If the DLP policy identifies data that appears to be sensitive personal data in a file, one of two things will happen.
1. You will receive an email
Immediately after pressing ‘Send’, you will receive an email informing you that the file was not shared because the DLP tool identified data that appeared to be sensitive personal data. The email will look like this:

2. You will receive a policy tip
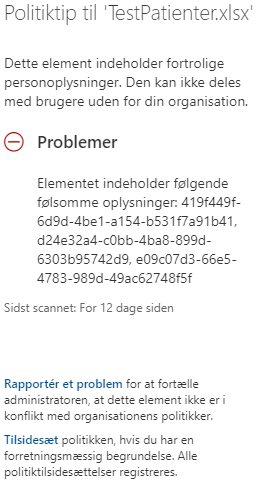
In SharePoint, a policy tip will appear if the DLP tool identifies data that appears to be sensitive personal data. The policy tip will look like this:
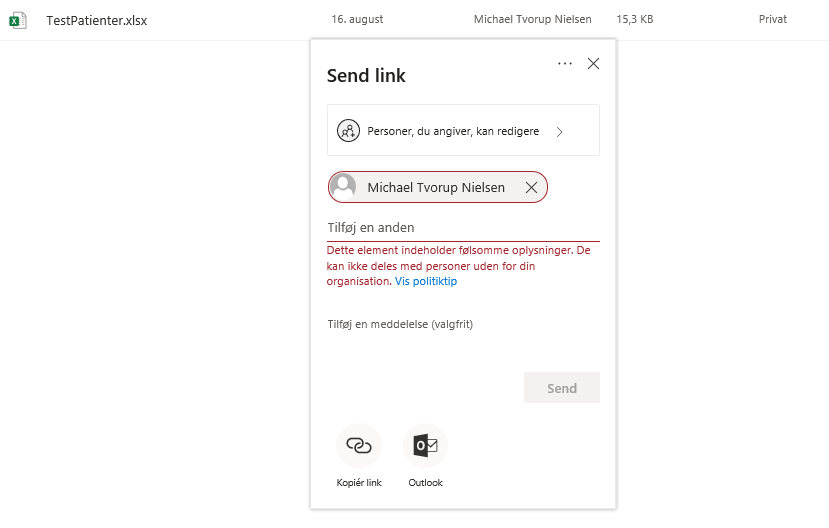
The same text and a link to ‘View policy tip’ will appear under the file information.
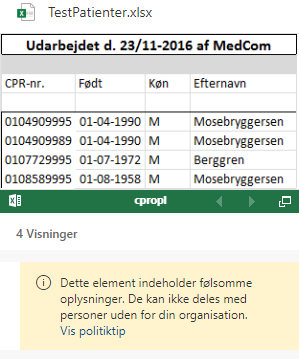
If you click on ‘View policy tip’, you will see the options below:
Option 1
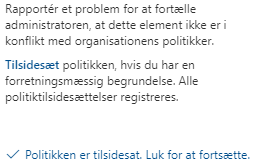
If you select ’Report a problem’, you will receive the message below. The DLP policy will be overridden, and you will be able to share the file with external recipients.
Option 2
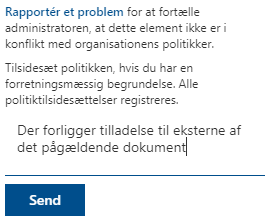
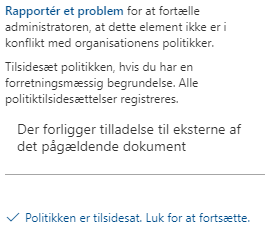
If you select ‘Override’, you can fill in a business justification. The DLP policy will then be overridden, and you will be able to share the file with external recipients.
Editing files containing sensitive personal data
If you edit a file from SharePoint containing sensitive personal data that is covered by the DLP policy, the following ‘Policy tip’ will appear.
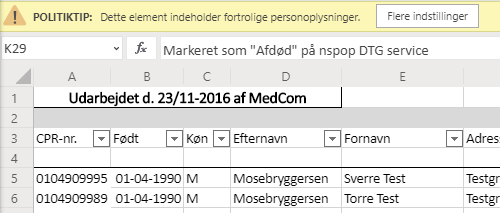
If you click on ‘More options’, the document library where the document in question is saved will open.
External users denied access because of a DLP policy
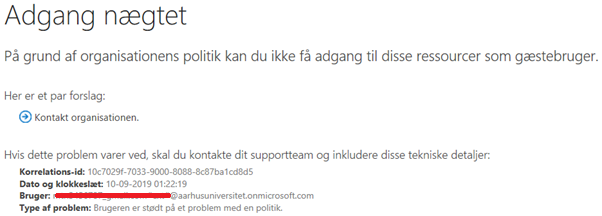
If an external user previously had access to a file that is now covered by a DLP policy, the user will now be denied access to the file. The external user will receive the message below.
If the external user needs access to the file going forward, you must contact your local IT support team.
How to override the DLP tool in case of a false positive (Mac and webmail)
If the DLP tool stops an email by mistake – a so-called false positive –, you can use webmail to override the DLP tool if you are a Mac user.
- Click ‘New message’ and create the email you want to send. Do not click ‘Send’ yet.
- If the email recipient is a person outside AU and the email text contains something which appears to be sensitive personal data, a tip will be displayed. Click ‘Show details’.

- Then click ‘Override’.
- Select ‘This message doesn’t contain sensitive information’ and then click ‘Override’.
